Installation
Ports and connectors
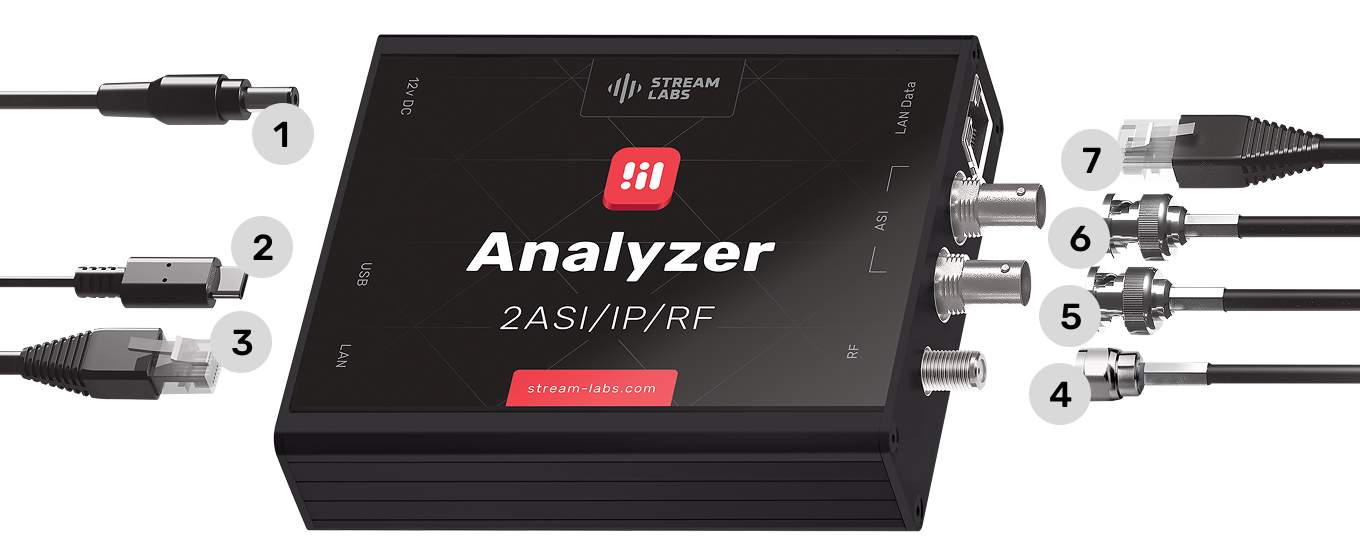
| # | Port | Description |
|---|---|---|
| 1 | Power | 12V DC power input. Use the included 110/230V universal adapter. |
| 2 | USB (Mini-B) | Firmware upgrade only. Not used during normal operation. |
| 3 | LAN (management) | 100 Mb/s. Connect to your computer or management network for web interface access. |
| 4 | RF input | DVB-T/T2 and DVB-C signal reception. |
| 5, 6 | ASI input | Two ASI inputs for transport stream monitoring. |
| 7 | LAN DATA | 1 Gb/s. Monitoring of MPEG TS and T2MI streams over IP. |
Do not confuse the two LAN ports
Port 3 (left side, labeled LAN) is the management interface — use this to access the web UI. Port 7 (labeled LAN DATA) is for IP stream monitoring only. Connecting to the wrong port is the most common reason the web interface is unreachable.
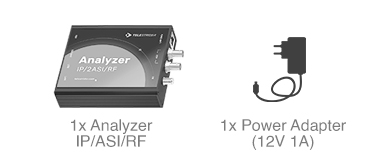
Package contents
The box includes:
- 1× TS Analyzer device (IP/2ASI/RF)
- 1× Power adapter (12V, 1A)
Connecting the device
- Place the TS Analyzer near your computer or switch.
- Connect the included power adapter to port 1.
- Connect an Ethernet cable from your computer's LAN port to the device's management LAN port (port 3).
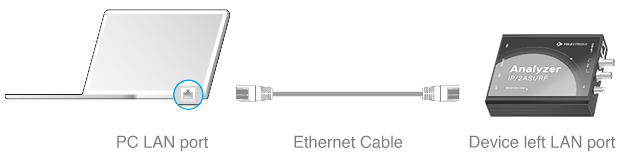
The device ships with a static IP address of 172.16.112.1. Before you can reach the web interface, your computer needs an address on the same subnet.
Configuring your computer's network interface
- Open Control Panel → Network and Sharing Center.
- Click Change adapter settings on the left.
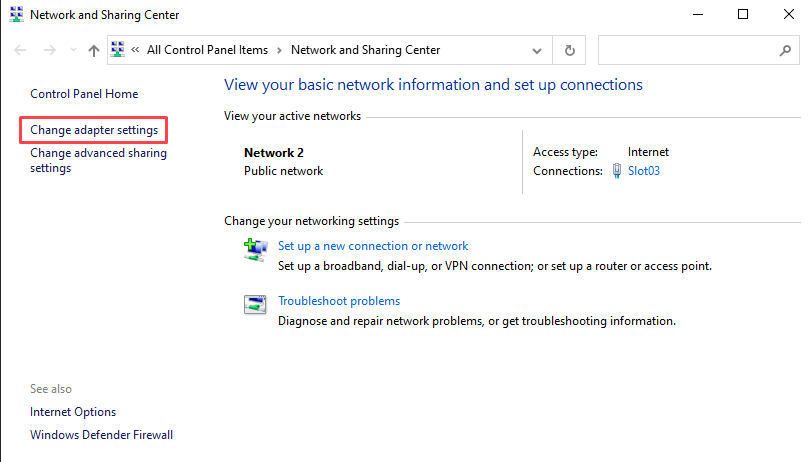
- Right-click the network interface connected to the TS Analyzer and choose Properties.
- Select Internet Protocol Version 4 (TCP/IPv4) and click Properties.
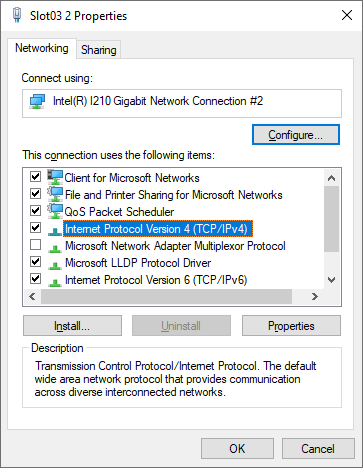
- Choose Use the following IP address and enter:
- IP address:
172.16.112.2 - Subnet mask:
255.255.255.0
- IP address:
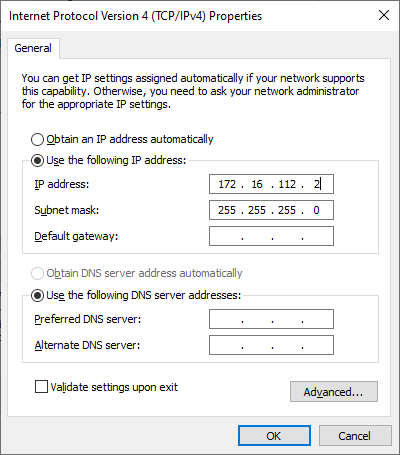
- Click OK to save.
- Open System Settings → Network.
- Select the Ethernet interface connected to the TS Analyzer.
- Set Configure IPv4 to Manually and enter:
- IP address:
172.16.112.2 - Subnet mask:
255.255.255.0
- IP address:
- Click Apply.
Run the following command, replacing eth0 with your actual interface name:
sudo ip addr add 172.16.112.2/24 dev eth0
To make the setting persistent, update your network manager configuration accordingly.
Accessing the web interface
- Open a browser and go to
http://172.16.112.1. - Log in with the default credentials:
- Username:
admin - Password:
admin
- Username:
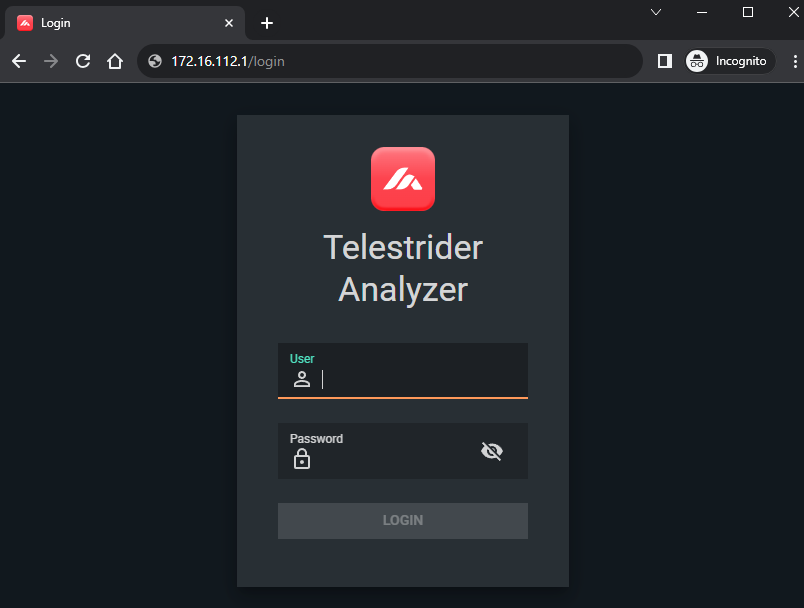
Change the default password
The default credentials are the same on every device. Change the password immediately after first login via Settings → Password before connecting the analyzer to any shared network.
Once logged in, refer to Network Configuration to assign the device a permanent address on your network.