Schedule — Schedule mode
Schedule mode is broadcasting strictly by time of day. Each schedule item has an exact start time. It is used by TV channels with a rigid program grid.
Switching modes
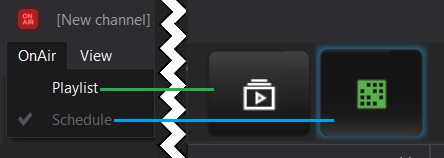
Switching between Playlist and Schedule happens without stopping the broadcast. The switch button is in the header of the Channel OnAir window.
Schedule items
Item types
| Type | Description |
|---|---|
| Clip | Video file from the storage |
| Live | Live source (SDI, NDI, IP stream) |
| Block | Group of items (commercial break, package) |
| Fixed Time | Item with a hard start time |
Adding an item
- Find the file in the content browser
- Drag it to the schedule grid at the required time
- Or: right-click a schedule row → Insert
Fixed Time
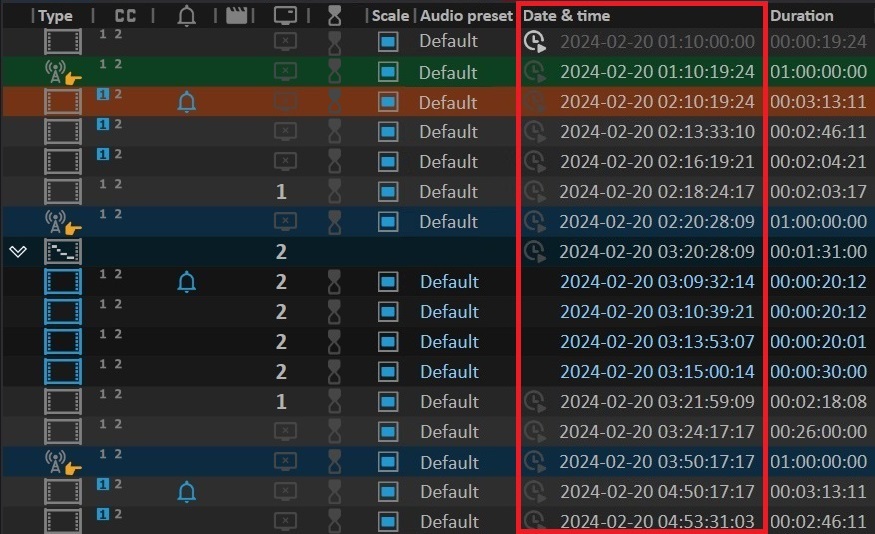
Fixed Time is a hard start time for an item. The item starts exactly at the specified time regardless of the state of the previous playback.
Creating a Fixed Time
- Select a schedule item
- Schedule Item Property → Fixed Time → Enable
- Enter the start time (HH:MM:SS:FF)
Overrun before Fixed Time
If the previous item has not finished by the time Fixed Time triggers, it is forcibly interrupted. Make sure the schedule duration between Fixed Time points is calculated correctly.
Overrun and Underrun
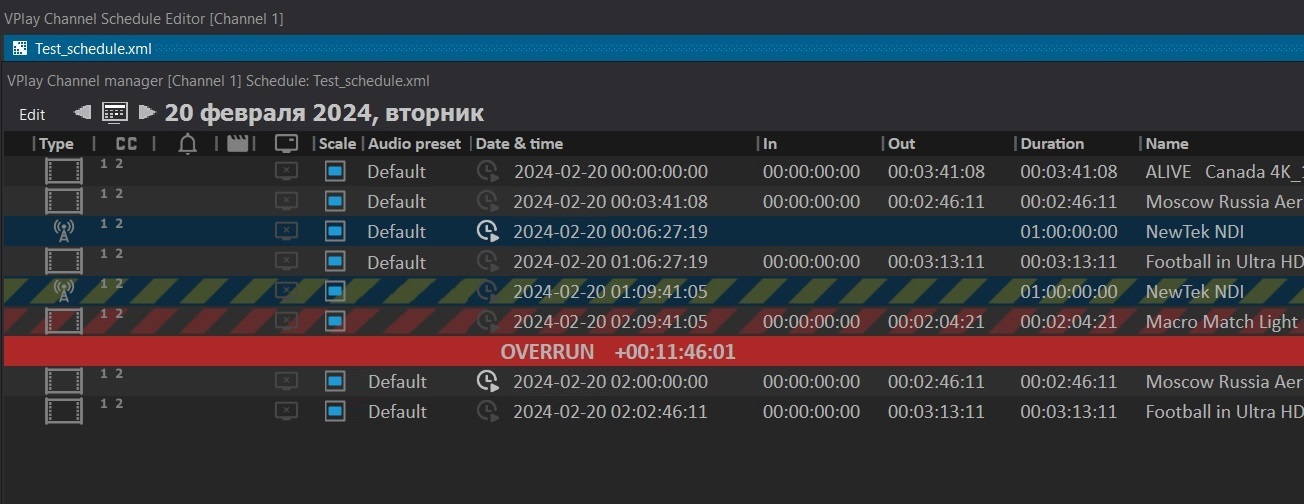
Overrun — exceeding the planned time
Occurs when the total duration of the items before a Fixed Time is greater than the allotted time. VPlay warns about Overrun with color indication in the schedule.
Overrun handling strategies:
- Trim — automatically shorten the last item before the Fixed Time
- Remove — remove the last item if it does not fit
- Manual — the operator removes or trims items manually
Underrun — unfilled time
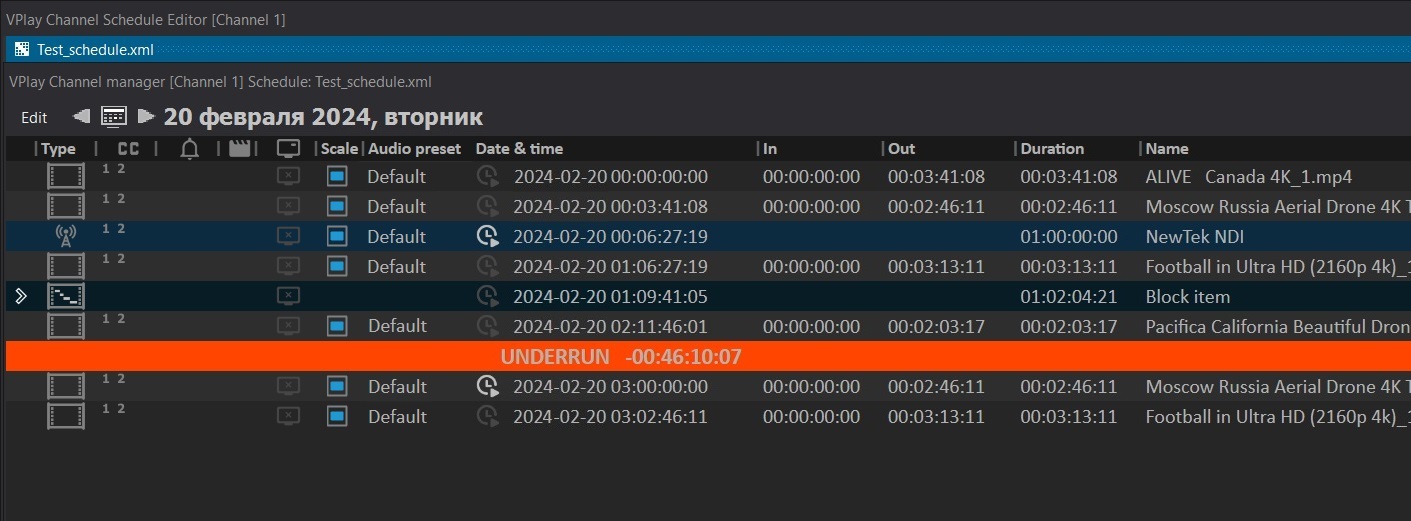
Occurs when free time remains before a Fixed Time. VPlay automatically fills the gap with:
- Backup content (configured in Server Settings)
- Color Bar
- A repeat of the last item
Working with live broadcasts
Adding a Live source to the schedule
- In the schedule, select the position for the live broadcast
- Right-click → Insert Live
- Select a preconfigured source (SDI, NDI, UDP, etc.)
- Set the duration or leave Open End (manual stop)
Preparatory playlists
To make work easier during a live broadcast, it is recommended to prepare additional playlists in advance:
- Slates in case of technical problems
- Commercial spot packages
- Lead-ins and lead-outs
Switching between the main schedule and a preparatory playlist is done through the View menu or hotkeys.
Overrun mode — on-the-fly changes
In a live broadcast, the schedule often changes in real time. VPlay supports:
Adding items on the fly
Drag a file from the browser to any place in the queue during the broadcast. The change is applied immediately.
Schedule shift
If a live source is delayed: select the next several items → right-click → Shift Time → specify the shift. All subsequent items are shifted, preserving the relative intervals.
Working with a growing file
VPlay supports playing a file that is still being recorded (growing file). The duration in the schedule is updated dynamically as the file grows.
Working with SCTE-35/104 markers
Splice mode (automatic replacement)
VPlay can work in retransmission mode with local content insertion:
- The server receives an incoming IP stream or SDI with SCTE-35 markers
- When a SCTE-35 marker is detected (the "start of commercial break" signal), VPlay automatically switches to local content (a commercial block from the schedule)
- When the local block ends, or when an "end of break" marker is received, it returns to the incoming signal
Configuring marker detection
Channel Settings → SCTE → Input Markers:
| Parameter | Description |
|---|---|
| Enable DTMF detection | Enable detection of DTMF tones |
| Enable SCTE-35 detection | Enable detection of SCTE-35 in IP TS |
| Enable SCTE-104 detection | Enable detection of SCTE-104 in SDI |
| Splice mode | Immediate splice or at a key frame |
Configuring outgoing markers
Channel Settings → SCTE → Output Markers:
VPlay can generate outgoing SCTE-35 markers in UDP/HLS streams and SCTE-104 in SDI/NDI at the start and end of schedule items.
AWS SCTE-35
Support for generating markers in the AWS Elemental MediaLive format for integration with cloud distribution platforms.
Input signal redundancy
When working with live sources, VPlay supports redundancy:
- Channel Settings → Live Inputs → Add Backup
- Assign a backup source (another SDI, NDI, or IP stream)
- Set the switchover timeout (seconds without signal → switchover)
When the primary source is lost, the switchover to the backup happens automatically within the timeout. When the primary source is restored, the return follows a configurable policy (immediate or manual switchover).
Importing a schedule from external systems
Supported formats
VPlay includes a configurable schedule importer. The input format (XML, CSV) is configured through a field mapping template.
Standard schedule fields:
| Field | Description |
|---|---|
START_TIME |
Item start time (HH:MM:SS) |
DURATION |
Duration |
CLIP_NAME |
File name or Asset ID in PAM |
TITLE |
Display title |
FIXED_TIME |
Fixed Time flag (0 or 1) |
BLOCK_ID |
Block identifier |
Automatic import
Configured in Server Settings → Channel → Schedule Auto Import:
- Specify the watch folder (Watch Folder)
- Set the check interval (in minutes)
- VPlay automatically applies new schedule files as they appear
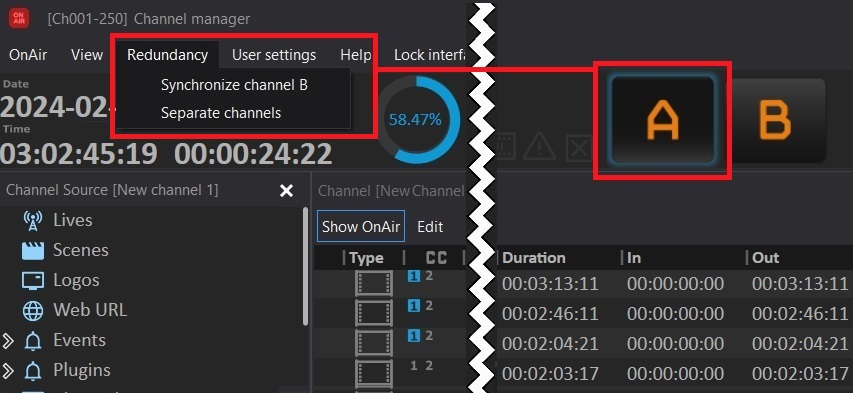
Schedule synchronization in redundancy mode
When working with a pair of servers (1+1):
- The schedules of both servers are synchronized in real time
- A change on either server is instantly replicated to the paired one
- If desynchronization occurs, Channel Manager displays a warning indicating the discrepancies
Forced synchronization: right-click the channel → Force Sync — copies the schedule from the selected server to the paired one.
Teleprompter mode
VPlay includes a built-in teleprompter mode for studio work:
- View → Teleprompter
- Connect an additional monitor
- The text from the Description field of schedule items is displayed in a large font with a configurable scroll speed
Speed control: a foot pedal controller or the keyboard.