VPlay Launcher
VPlay Launcher is the single entry point to the VPlay system. It starts from the desktop after the client components are installed. It lets you connect servers and channels and launch Channel Manager, Scene Editor, and Server Settings.
Authorization
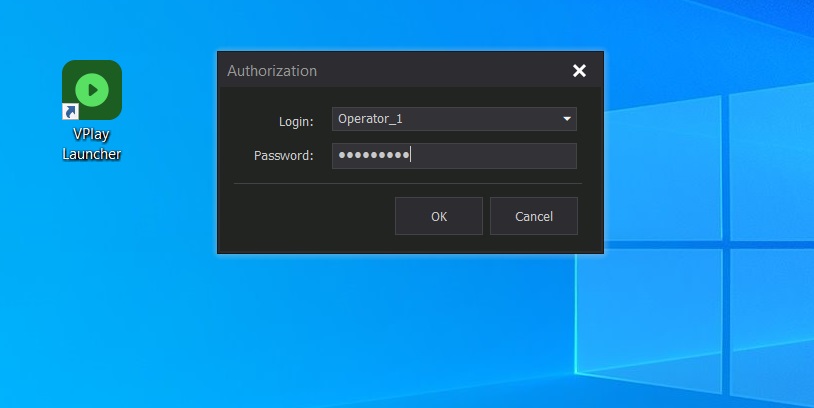
When you start the Launcher, the authorization form appears. Enter your login and password (the default is Admin / 12345).
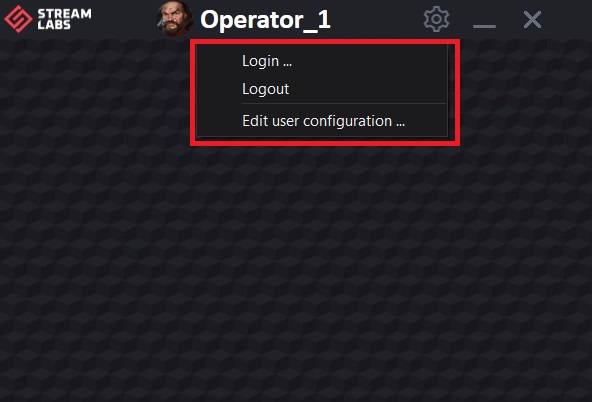
Switching users without restarting: right-click in the top bar of the window →
- Logout — log out of the current user account
- Login — log in as a different user (without logging out first)
- Edit user configuration — server and channel settings
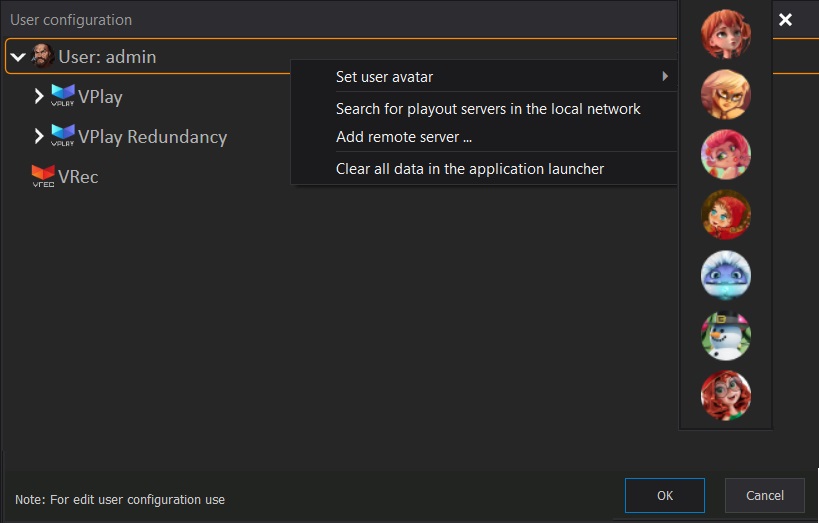
Changing the avatar: User configuration window → right-click the User: Username row → Set user avatar → select an image.
Adding servers and channels
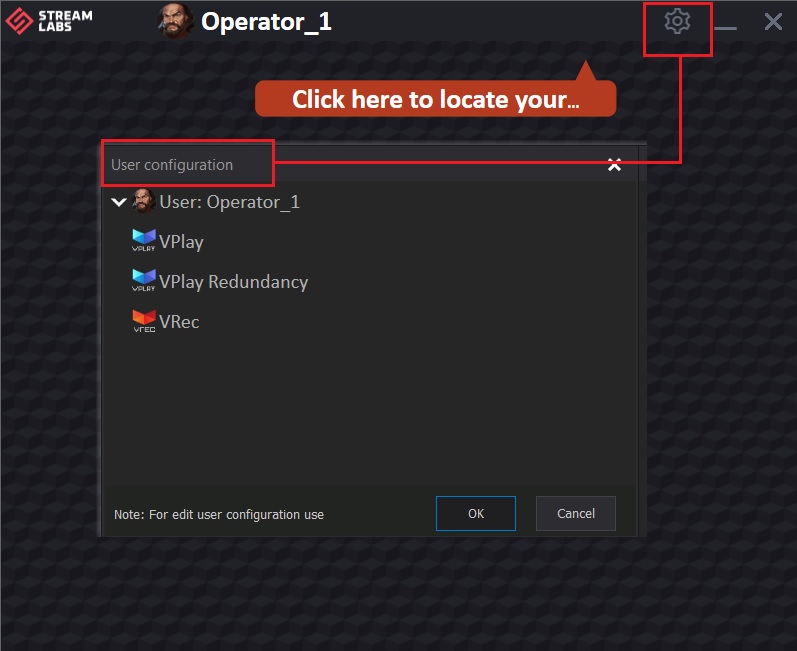
To open the settings, click the gear button in the right corner of the main window. The User configuration window opens.
Automatic server search
- In the User configuration window, right-click the User: Username row → Search for playout servers in the local network
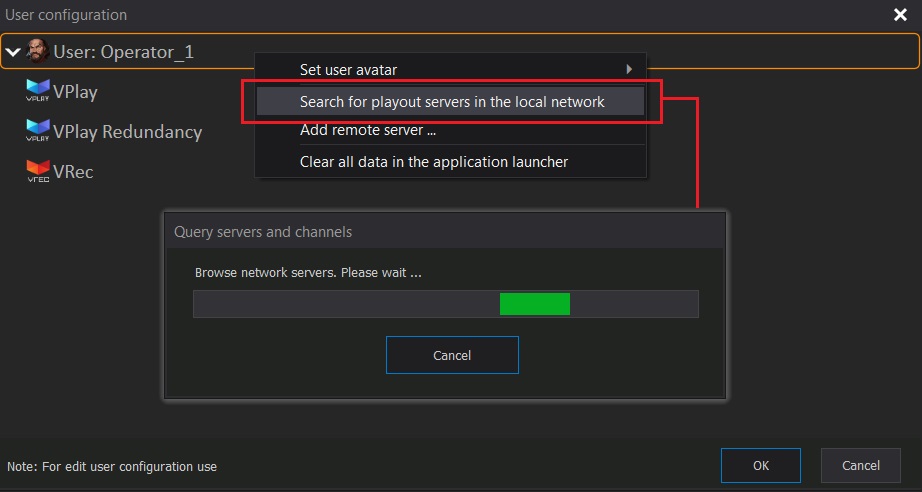
- VPlay Launcher finds all VPlay servers on the local network and displays them with their channel lists
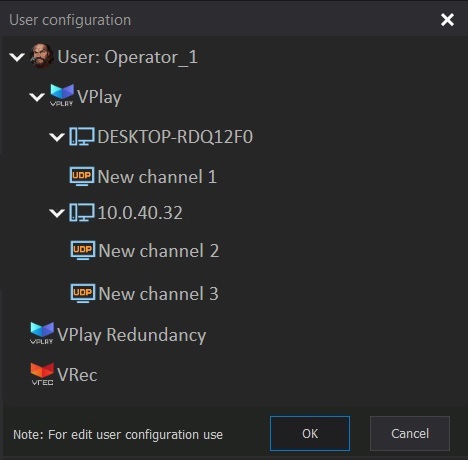
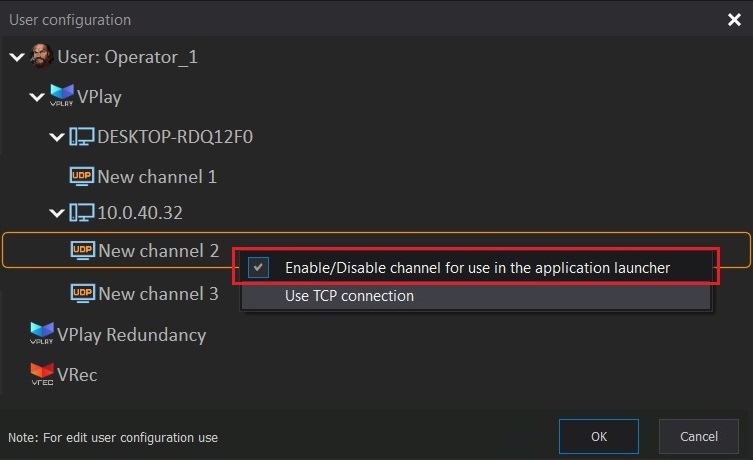
- To exclude an individual channel, right-click the channel name → Enable / Disable channel for use in the application launcher
- To manage a whole server, right-click the server IP:
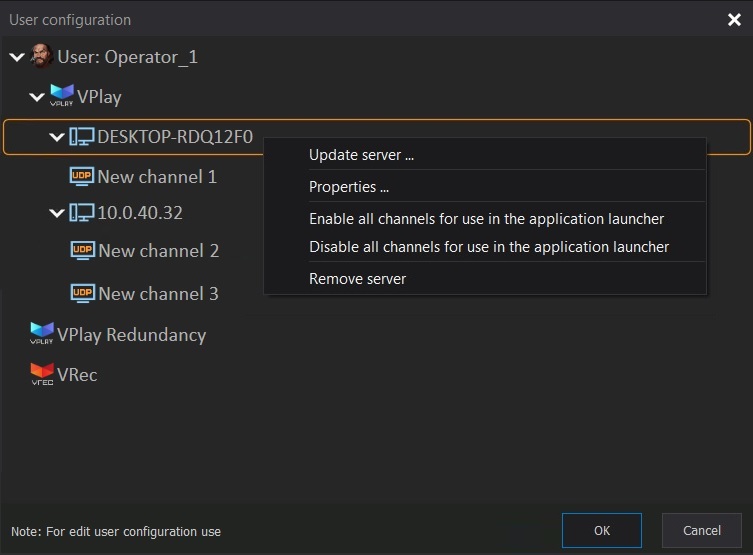
| Item | Action |
|---|---|
| Update server | Poll the server again and refresh the channel list |
| Properties | Change the server name or IP |
| Enable all channels | Add all of the server's channels to the Launcher |
| Disable all channels | Exclude all of the server's channels (the server remains) |
| Remove server | Remove the server and all its channels from the configuration |
- Click OK to save
Adding a server manually
- Right-click User: Username → Add remote server
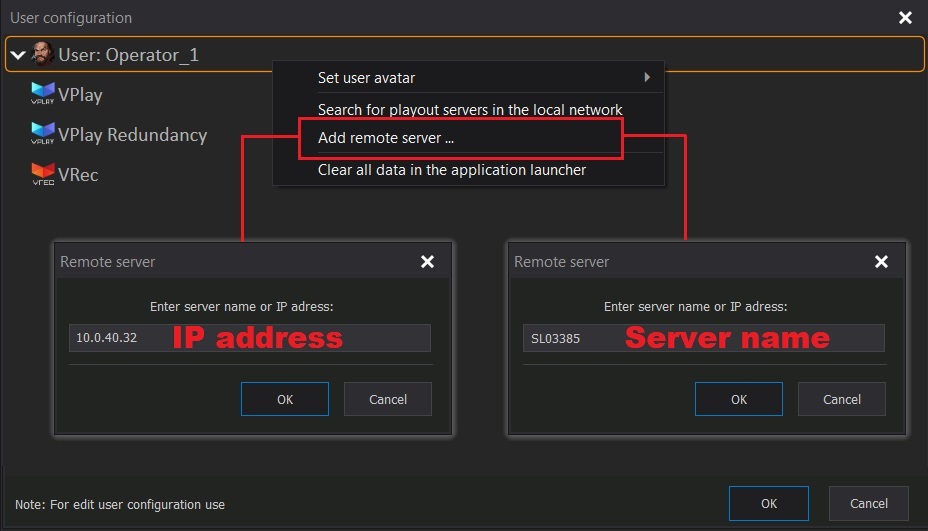
- Enter the IP address or the system name of the machine → OK
- After the server is added, the list of channels on that server appears
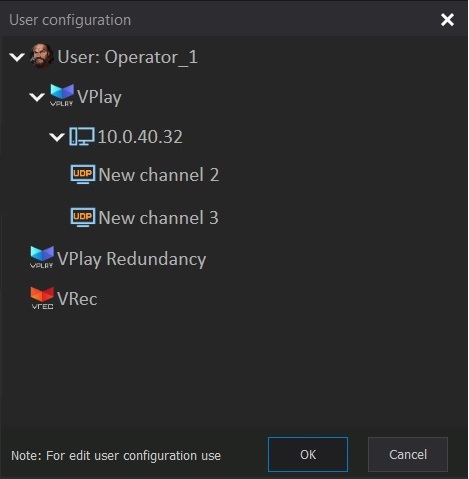
- Click OK to save
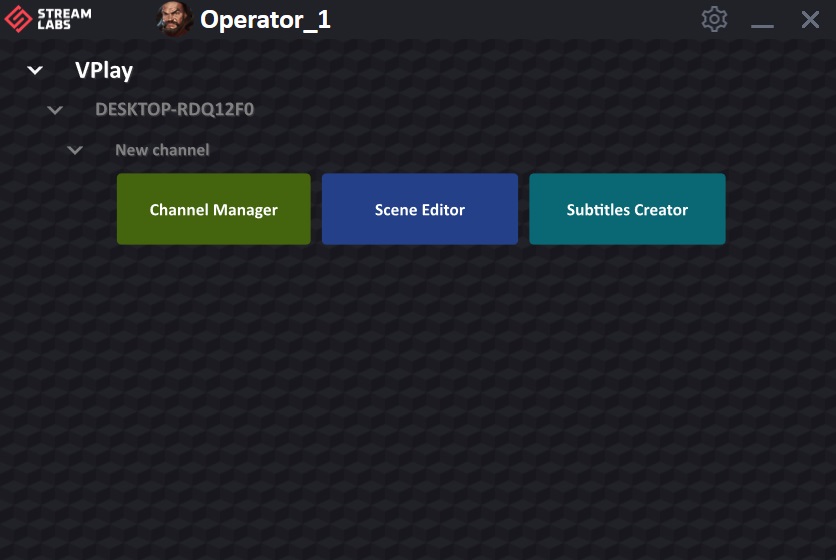
After setup, the Launcher displays all added channels with their status:
Clearing the configuration
To clear all data completely, right-click User: Username → Clear all data in the application launcher.
Adding servers in redundancy mode
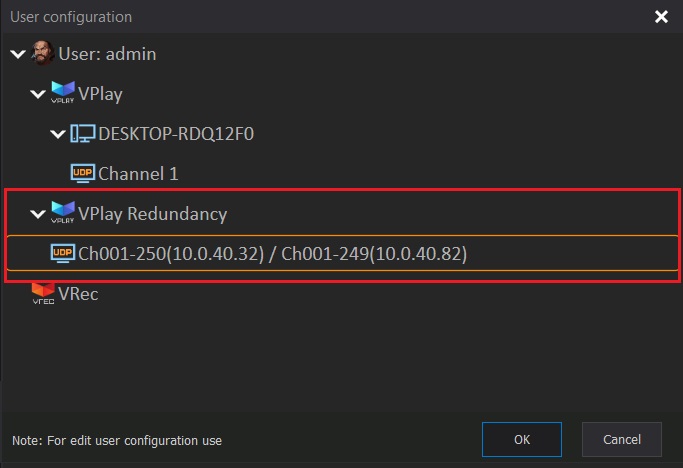
When you add a pair of servers running in 1+1 mode:
- Add the first server (automatically or manually)
- Add the second server of the same redundancy pair
Do not open Channel Manager until both servers are added
If you open Channel Manager while only one server of the pair has been added, the software may not work correctly.
- After both servers are added, the Launcher automatically detects them as a redundancy pair
- The servers are assigned the names A and B in random order (both are equivalent)
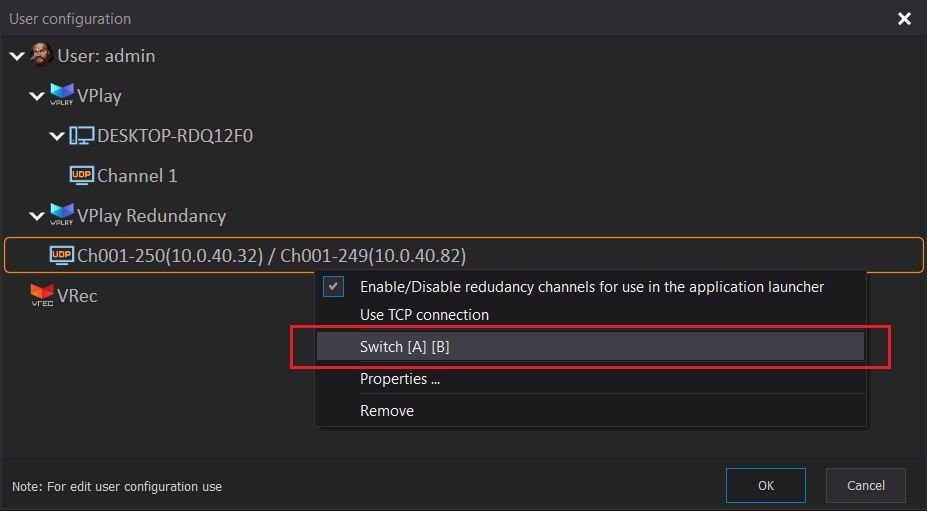
Swapping A and B: right-click the channel pair → Switch [A] [B].
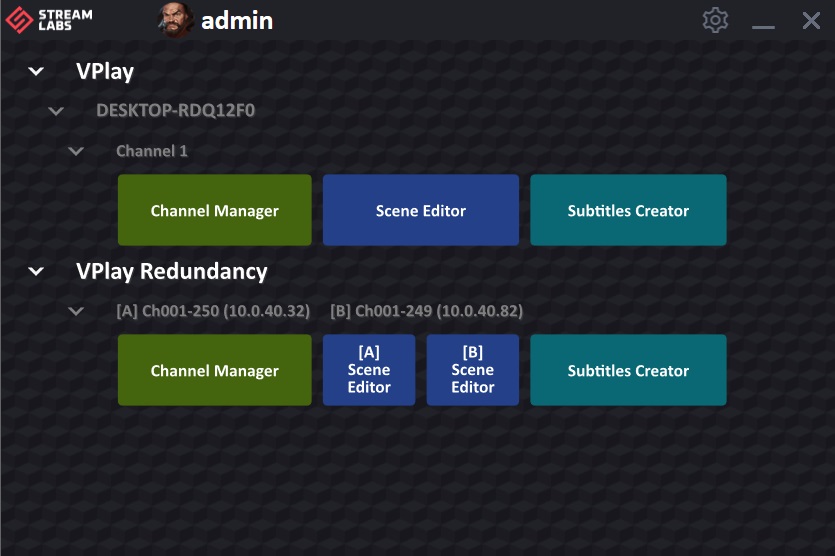
After the redundancy pair is configured, the Launcher is ready to use:
Changing the connection protocol (UDP / TCP)
The default protocol is UDP (higher speed). On unstable networks, TCP (which guarantees packet delivery) is recommended.
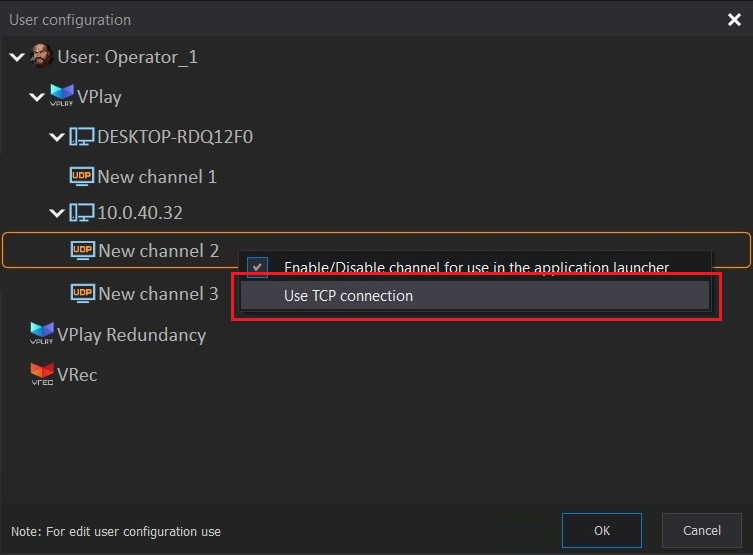
To switch, right-click the channel name → Use TCP connection (the first click switches to TCP, and the next click switches back to UDP).
Launching applications
After setup, the Launcher displays all added channels. To work with a channel, click it, and then select an application:
- Channel Manager — schedule creation and on-air control
- Scene Editor — creating graphics scenes
- Server Settings — server configuration (administrators only)