Teleprompter
VPlay has a built-in teleprompter feature — it displays pre-prepared text over the channel picture. Lines are controlled manually through the web interface; automatic advance to the next line is not provided.
Preparing the text file
- Create a file in
*.txtformat 
Save it to the channel folder: ...\Channel folder\Scenes\TextSource\
3. The file name must not contain spaces. Unicode (non-Latin) file names are supported
4. Each line of the file = a separate teleprompter block (the separator is a line break)
Creating a teleprompter graphic scene
- Open Scene Editor from VPlay Launcher → select the instance for the required channel
- File → New → set the scene name and duration
- Add a Static Text object
- In the object properties (Properties → Text edit), enter:
where
<xml="FILE_NAME\1"/>FILE_NAMEis the name of the txt file without the extension (for example,<xml="NewsSUB\1"/>) - Set the font, size, and position of the object
- Export → save as Scene → the scene appears in the channel storage
Running the scene on air
Play the scene in one of these ways:
- Add it to the schedule as a regular GFX scene (Item's Scenes window)
- Start it manually via Channel Manual GFX Ctrl
Working in the teleprompter web interface
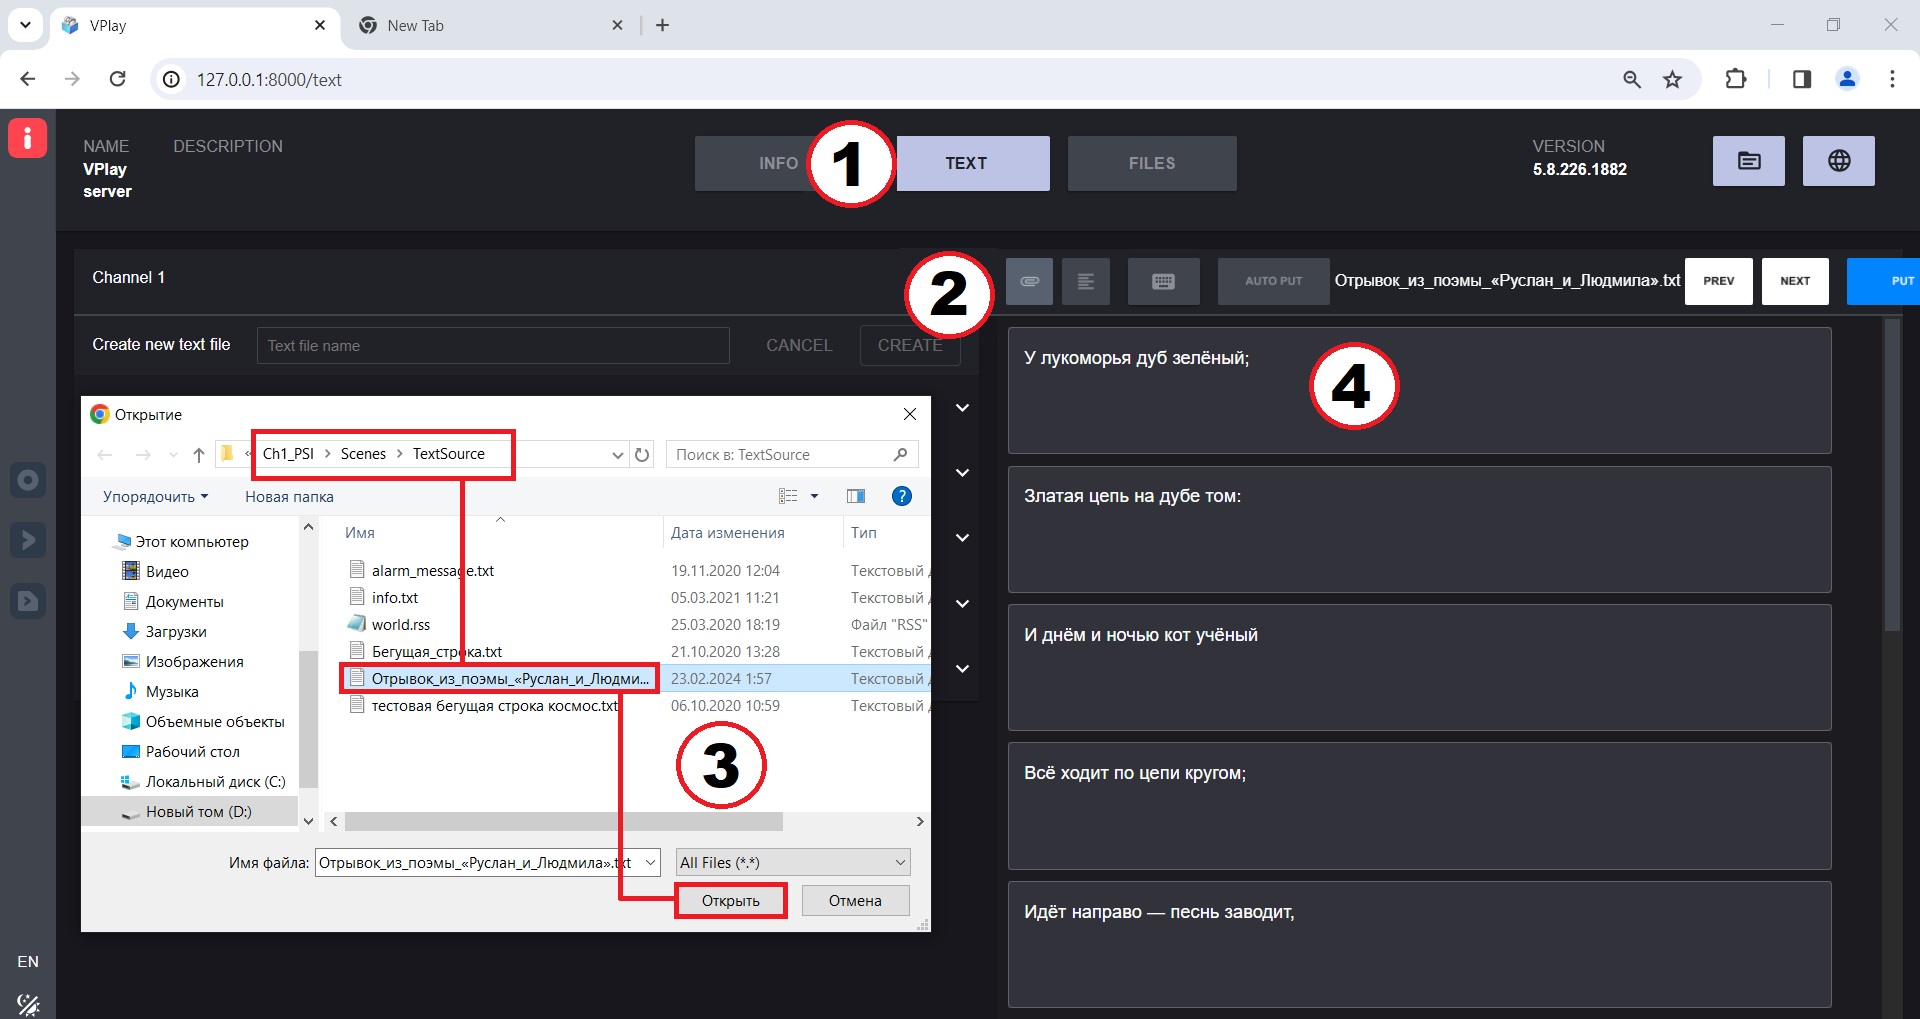
Open in a browser: http://127.0.0.1:8000/text
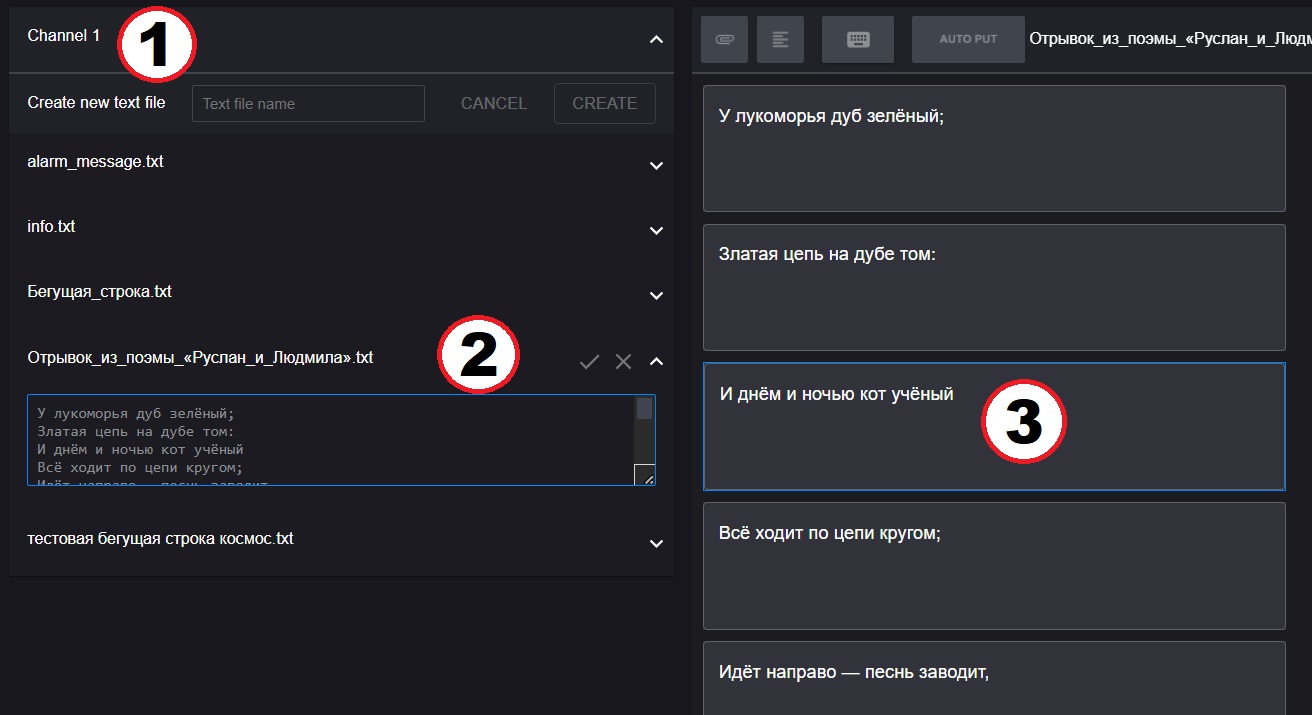
- On the left, select the required channel
- Select a text file from the list → click the arrow to expand it
- On the right, select the text block that should be played first
- A blue frame appears around two blocks — the teleprompter is ready
- Click Put
 — the selected block is displayed in the channel preview
Teleprompter control menu
| Button | Function |
|---|---|
| Attach (paperclip) | Upload a new text file |
| Put | Display the selected block on screen |
| Auto Put | Sequential output mode. Select the starting block → click Auto Put → use the Prev/Next buttons |
| Prev / Next | Move focus to the previous/next block |
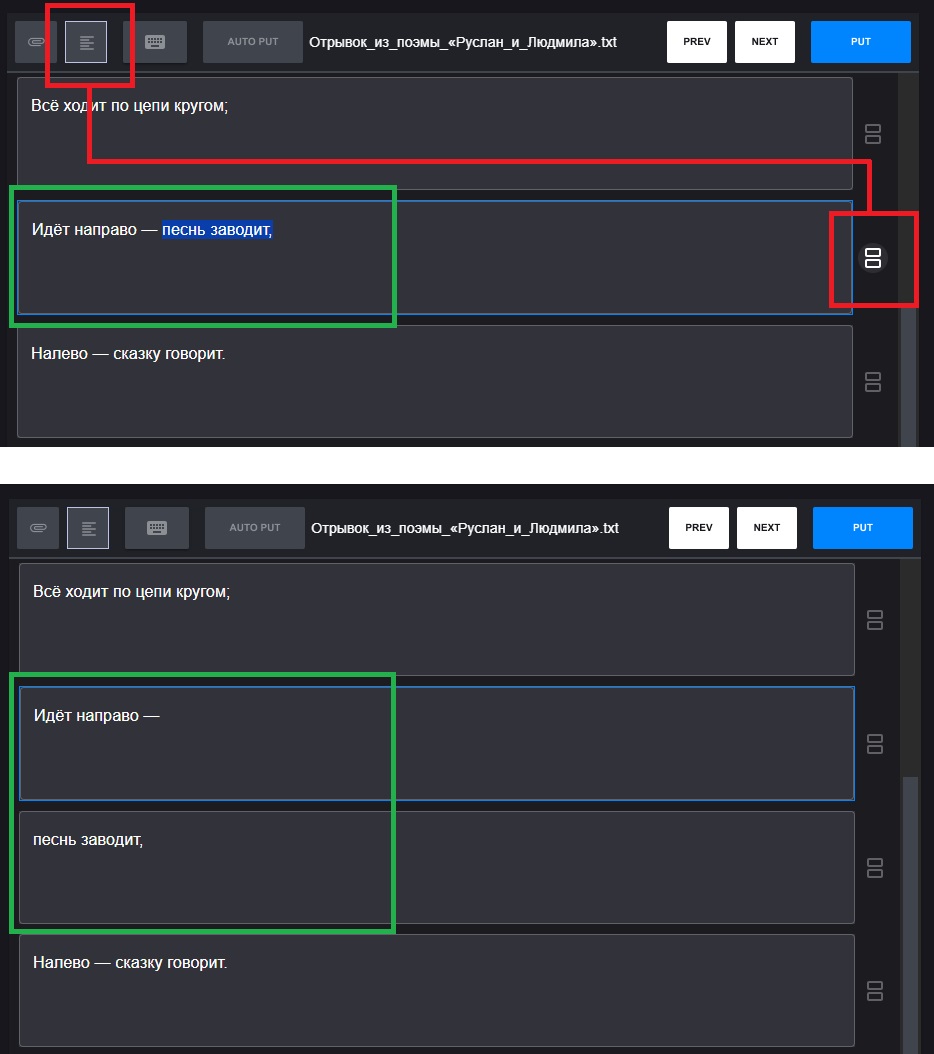 |
| Toggle edit mode | Line-breaking mode — buttons appear for splitting a block into 2 or 3 parts | | Hotkeys | Assign hotkeys to the control buttons (single keys only, not combinations) |
Line breaking
In edit mode (Toggle edit mode):
- To split into two blocks: select the part of the text to move, then click the split button
- To split into three blocks: select the middle part → the first and last parts become the first and third blocks, and the selected part becomes the second
Limitations
- Hotkeys work only while the web interface window is open
- Automatic line advance is not provided — only manual control via Put / Auto Put